SAC Connection
Introduction
In order to be able to connect to the SAC system, certain parameters must be inserted within the Performer Suite. This process is described in detail in this article below.
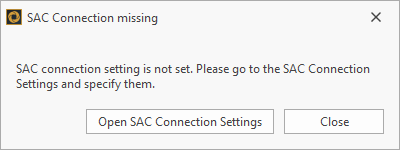
SAC Connection missing
Under ”Administration > Connection Data > SAC Connection“ you can enter the mandatory connection parameter for your available platforms.
The following information is required for a SAC connection:
Authorization URL
Token URL
Parameters of your OAuth Client
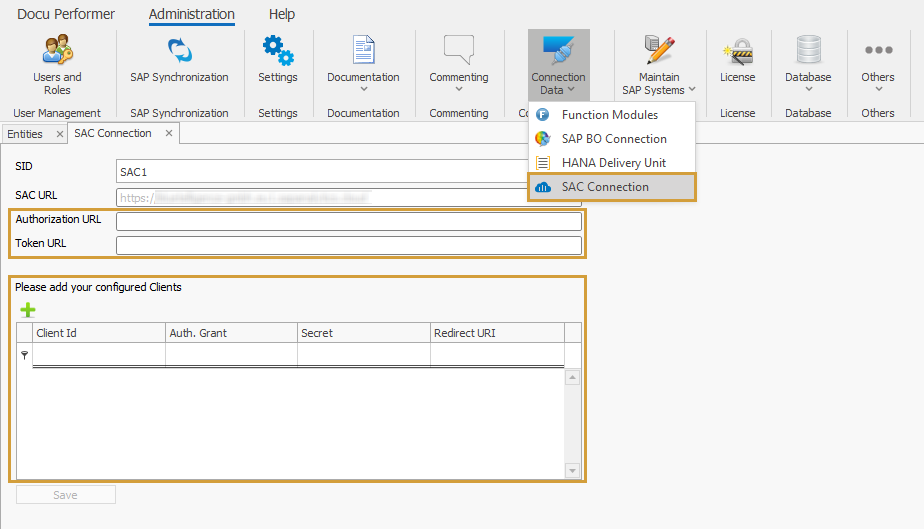
Required for SAC connection
SAC Administration
The following chapters describe, where the mandatory parameters can be found in your SAC.
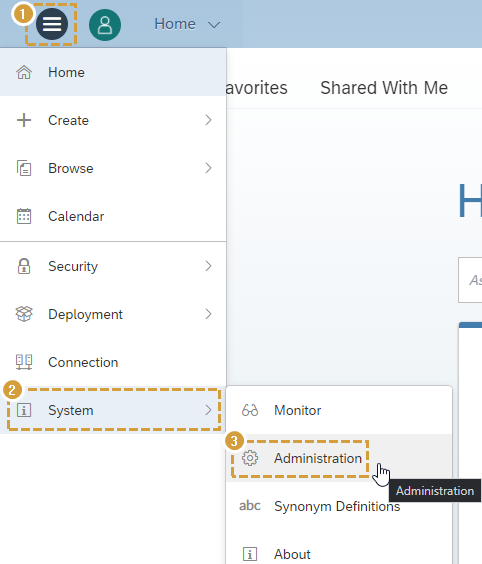
System Administration
URLs
Your SAC > System > Administration > App Integration
Please enter your two URLs into your Performer Suite in the respective parameter fields (Authorization & Token URL).
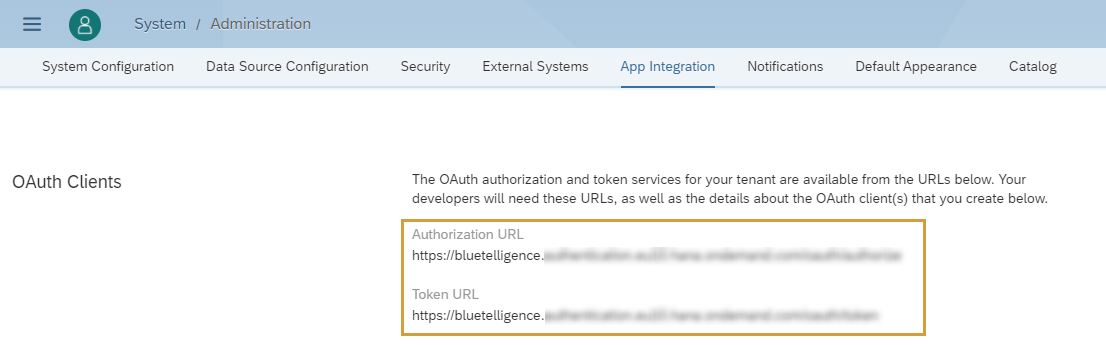
Authorization & Token URL
Authorization & Token URL
Create OAuth Client
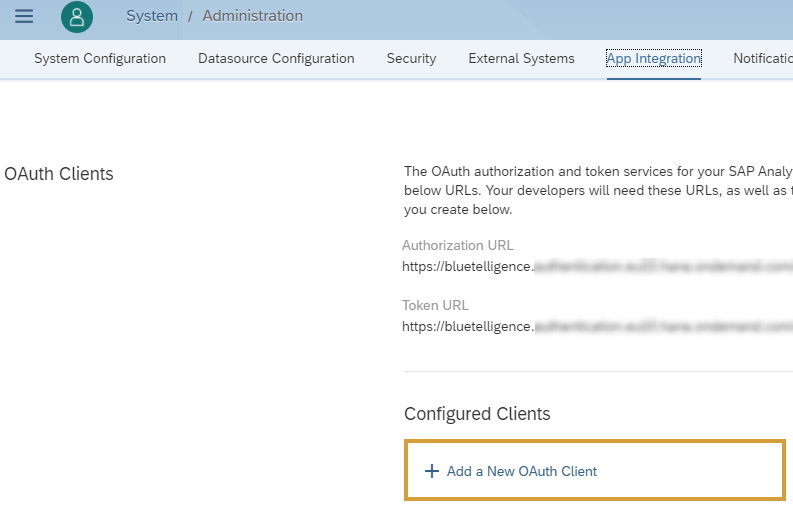
Add a New OAuth Client
In order to be able to access your SAC systems from the Performer Suite, an OAuth client must be added to your SAC.
Your SAC > System > Administration > App Integration > Add a New OAuth Client
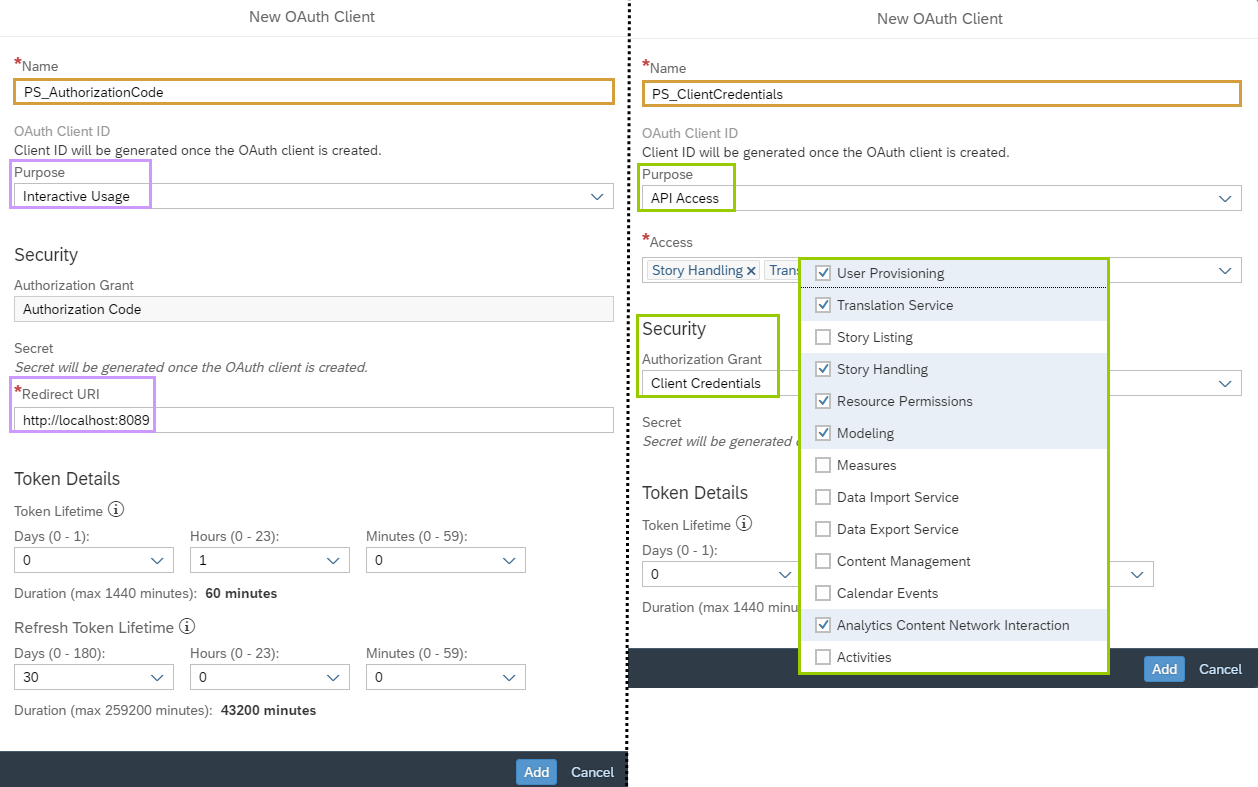
Two authorization methods are possible:
Interactive Usage (Authorization Code Grant)
API Access (Client Credential Grant)
Which OAuth client type should I create?
You can create both and see what works better for you.
If you are using SSO for your SAC, then create an OAuth Client with the Purpose "Interactive Usage" (Authorization Code Grant) and the Redirect URI http://localhost:8089.
In all other cases, especially if you plan to use the AutomationTool, then create an OAuth Client with the Purpose "API Access" (Client Credential Grant) to have a “machine-to-machine” authorization.
For Access, enable the following 6 checkboxes:
Create an OAuth Client
For Authorization Grant select Client Credential.
SAC UPDATE: SAML2.0 Bearer
SAC has updated to the Q2 2024 release and introduced a new Authorization Grant-option called "SAML2.0 Bearer", which currently should not be selected.
The Performer Suite does not yet support it.
Learn more: SAP blog article
Enter SAC Parameters
In the last step, enter your two SAC URLs into the following text fields:
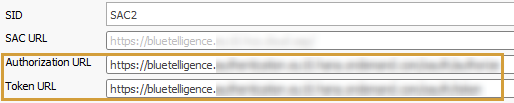
Enter your SAC URLs
Add a new OAuth Client within the Performer Suite with the "Add"-button and enter the required OAuth parameters:

Enter OAuth parameters
The following parameters must be entered for this connection type:
Interactive Usage
Client Id
Auth Grant = Interactive Usage
Secret (optional)
Redirect URL
API Access
Client Id
Auth Grant = Interactive Usage & API Access
Secret
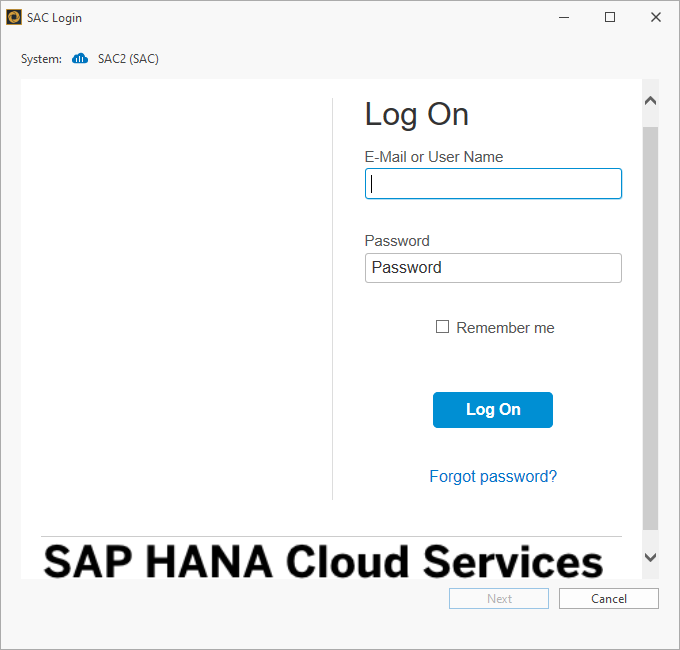
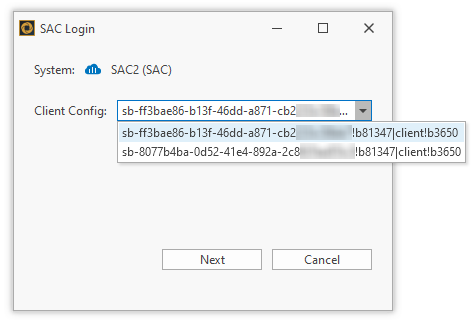
SAC Connection in Login Window
The OAuth clients defined in the Performer Suite can be selected at SAC login:
SAC login
If the defined OAuth client is "Interactive Usage", a user login is required.
(if SSO is enabled in your SAC: this login window will not appear and will login straight)